Party recommended
From the video
Take one platform your character can handle. Ranged characters can attack safely from the grass ledges or hay bales.
Public Release snapshot
 Green MushroomLv 14
Avg Lv 5.739 points

Guide · Mechanics
This is a faithful companion to the video, not a new site ranking. The map order and practical advice come from DinoFries; spawn counts, monster levels and icons come from the website’s Public Release snapshot, and for the 5 Forgotten Hollow stops the release does not have, from the Closed Online Test 2 rows the site keeps, marked CoT2.
The busy town-adjacent maps and compact party rotations that open the video.
Take one platform your character can handle. Ranged characters can attack safely from the grass ledges or hay bales.
Green MushroomLv 14Put one or two players on each upper platform and divide the long lower floor between several players.
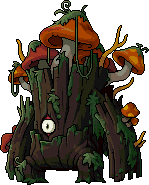
 Dark StumpLv 11
Use the tree holes and ladders to loop through the compact map. This is his smaller-party choice in the three-map set.
 SlimeLv 6
Treat the bridges as separate lanes. This is the larger version and the one he assigns to a full party.
SlimeLv 6Use this when Slimes are no longer useful and you want Green Mushrooms mixed with Stumps and Dark Stumps.
Dark StumpLv 11Split the scaffolding by platform and leave one or more players on the lower floor to clear the Stumps and Blue Snails.
 StumpLv 5
Assign the L-shaped platforms across the group and ignore the isolated Iron Hog in the upper-right corner.
 Ribbon PigLv 10
Enter the hidden street from Construction Site North of Kerning City. Use two players at the top, two in the middle and two at the bottom, with the stronger characters on the lower section.
 OctopusLv 12
Use the same two-top, two-middle and two-bottom split as Construction Site North. He describes the maps as inverse twins.
OctopusLv 12Single-target rooms, flying Stirges, mushroom tunnels and the first boar rotations.
The room is crowded but large and contains only Bubblings. Keep attacking nearby spawns instead of trying to reserve one platform.
 BubblingLv 15
Put one player at the top, one on the middle platform and two on the bottom. Jr. Necki is the target, so make sure you can hit it.
 Jr. NeckiLv 21
Split three players across the top and three across the bottom. Keep attacking through the chaos rather than chasing one flying Stirge.
 StirgeLv 20
Cover the left, right, middle and lower sections. Stirge is the target; the mushroom spawns are acceptable support mobs.
StirgeLv 20Divide the map into top, middle and lower-right sections, with one player on the platforms and one on the floor in each section.
 Horny MushroomLv 22
The larger layout is less obvious to divide. Start with three players above and three below, with two roaming between sections.
Horny MushroomLv 22Use one player at the top, one in the middle and two or three on the bottom. Clear Jr. Boogies when their long respawn brings them back.
 Wild BoarLv 25
Put one player on the upper platform and divide the lower platform between one or two more. Fire Boar is the main target.
 Fire BoarLv 32
The high-density Jr. Wraith rooms, and the Forgotten Hollow maps he prefers for their layouts and tight monster ranges, which are from Closed Online Test 2: the Public Release does not have them.
Split three players across the bottom and three across the top. Jr. Wraith is the target and the Jr. Neckis are close enough not to disrupt it.
 Jr. WraithLv 34
Use the same three-and-three split. He considers it less preferable than Line 2 Area 1 because Stirges replace the Jr. Neckis.
Jr. WraithLv 34Sweep left-to-right and top-to-bottom for Lupins while ignoring the few Jr. Neckis on the floor.
 LupinLv 37
Use the glowing plant warp points. Assign the top, middle-left, middle-right and bottom sections to one player each.
The Public Release does not have this map. Its rows are kept from the second closed test, which is where he played it.
 RaffleLv 40
Treat it like a three-section Ant Tunnel rotation, with one player in the top-right, middle and bottom-left sections.
The Public Release does not have this map. Its rows are kept from the second closed test, which is where he played it.
RaffleLv 40Put two players on the lower floor and one across the upper platforms. He likes the flat layout and the close monster levels.
The Public Release does not have this map. Its rows are kept from the second closed test, which is where he played it.
 AqumanderLv 43
One player takes the left and one takes the right. He explicitly advises against soloing because of the travel between both sides.
The Public Release does not have this map. Its rows are kept from the second closed test, which is where he played it.
 RafflesiaLv 47
Drakes, Florina Beach, the Wraith rooms and the last higher-level duo maps in the video.
Solo through the central platforms and ignore the extreme corners, or split the upper and lower platforms between two players.
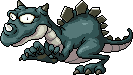 DrakeLv 50
Divide the upper, middle-left, lower and middle-right platforms. He includes this Florina map because Tortie and Clang are close in level.
 TortieLv 46
His standout pick: a Wraith-only room with exceptional density. Split three players across the lower half and three across the upper half.
 WraithLv 48
Use it when Line 2 Area 3 is crowded. The layout and three-and-three split are similar, but the video notes that fewer Wraiths spawn here.
WraithLv 48Use every tree hole to travel upward and divide the map into top, middle and bottom when grouped.
 Zombie LupinLv 41
One player takes the left and the other takes the right. He advises against soloing because crossing the whole map wastes the rotation.
The Public Release does not have this map. Its rows are kept from the second closed test, which is where he played it.
 Rotten MushroomLv 56
DinoFries explicitly calls the guide subjective and says class, power and launch changes can move the answer. Use his rotations as the tested starting point, then compare your real results instead of assigning his name to an extra map he did not recommend.