Fire Arrow
Basic Attack 180, Mastery level 10; Deals 50 Basic Attack over 3 sec
MP -28one monster at a time

Magician branch · 2nd Job
Magic Guard turns most of the damage you take into MP loss, so your blue bar is your health bar.
Fire Arrow does Basic Attack 180 to one monster and 50 more over the next three seconds. Your attack for the whole of 2nd job. Poison Breath hits six monsters and poisons them for 40 Basic Attack over five seconds at a 75% chance.
 Meditation gives +25 magic attack to you and everybody standing with you, for five minutes.
The line under each name is what the skill does at its last rank, read off the row. max N beside the name holds that against what a single point buys, which is the argument for spending the rest of them.
Anywhere on a card opens it, for every rank, its reach and what it rolls. Words like rank, mastery or booster are underlined wherever they are used and carry their own explanation.
You cannot max everything, and nothing in the game says so. For an order to spend them in, take one somebody has played.
F/P Wizard builds ›One point at the advancement and three a level, until level 70 stops this pool filling. The ranks are every rank the 6 skills hold between them, which is why the two numbers are not the same one counted twice.
Choosing what to leave out is the whole of building this class. The builds page is where somebody else's choice is written down, with the levels they made it at.
The tooltip states a damage or healing number. Mostly these are what you press to kill things; one or two are buffs that add damage rather than deal it, which is why the heading says damage and not attacks.
Basic Attack 180, Mastery level 10; Deals 50 Basic Attack over 3 sec
Basic Attack 80, Mastery level 10; 75% success rate, deals 40 Basic Attack over 5 sec
Everything whose tooltip states no damage: buffs, debuffs, movement, summons and doors.


Marked passive in the data. You buy the ranks and never press a key.

These belong to the jobs an F/P Wizard advanced through. They are still yours, they still cost out of those jobs’ own pools, and each has its own guide page.

Regenerates 1% of Max MP every 10 seconds; increases MP recovery from items by 20%

Max MP +25%


The Public Release has no 3rd job. These are Closed Online Test 2’s, kept so their pages and the builds saved for them still work.
Every quest below is gated at level 30, and the chain only appears for the Magician branch. There is nothing to do before then except arrive.
Having reached level 30 and mastered the way of the Magician, I feel the urge to learn more.
 Talk to Grendel the Really Old
It seems like Grendel the Really Old in Ellinia wants to test whether I'm worthy of receiving his teachings.
Talk to Grendel the Really OldBring with you
 Grendel the Really Old's LetterHanded to you when you accept the quest
The Magician Job Instructor at The Forest North of Ellinia seems ready to give me a test to see whether I deserve to become stronger.
 Talk to Magician Job Instructor
Bring with you
The instructor also stands in Magician's Tree Dungeon, which is the hidden area the test happens inside. The export carries no drop table for the quest items, so which monster in there drops them is not something this snapshot can tell you.
Now that I've passed the Magician Job Instructor's test, my strength should be proven!
Talk to Magician Job InstructorBring with you
 The Proof of a HeroHanded to you when you accept the quest
The chain ends where it started. The snapshot names who gives a quest and never who it is handed back to, so returning to the advisor is the game's convention rather than a row.
Passing the test is what opens the choice; the choice itself is not a quest. F/P Wizard is one of them - the others are one click away and each has this same page.
In Closed Online Test 2 the second job you took also decided your third: each one led to exactly one 3rd job. The Public Release has no 3rd job.
The Public Release has no 3rd job. In Closed Online Test 2, an F/P Wizard went on to F/P Mage, I/L Mage or Priest at level 70, and each one’s skills are kept on its page with the test’s numbers.
Even the test’s files never carried the advancement itself: no quest chain, no instructor and no level. Level 70 is the series’ own number rather than a row in any export.
 Ant Tunnel IIIZombie Mushroom · lv 242,049,048 EXP/hr
 The Swamp of Despair IILigator · lv 311,700,476 EXP/hrDeep Ant Tunnel IZombie Mushroom · lv 241,433,810 EXP/hr
Worth taking on the way: Maya's First Collection, Maya's Second Collection, The Magician's Next Journey · 35,480 EXP between them
 Line 2 <Area 1>Jr. Wraith · lv 342,608,571 EXP/hrLine 1 <Area 2>Jr. Wraith · lv 342,168,571 EXP/hr
 Lorang LorangLorang · lv 381,478,571 EXP/hr
Worth taking on the way: Special Taste of Florina Beach I, Special Taste of Florina Beach II, Special Taste of Florina Beach III · 58,480 EXP between them
 Line 2 <Area 3>Wraith · lv 483,950,476 EXP/hrLine 1 <Area 4>Wraith · lv 483,427,619 EXP/hrLine 2 <Area 2>Wraith · lv 483,311,429 EXP/hr
Worth taking on the way: Old Gladius, Reawakening the Gladius, Hero's Gladius · 98,400 EXP between them
 Lorang and ClangClang · lv 491,753,810 EXP/hr
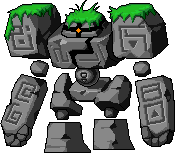 Sleepy Dungeon VDark Stone Golem · lv 581,737,143 EXP/hr
 The Tunnel That Lost Light IIDrake · lv 501,720,000 EXP/hr
Worth taking on the way: A Box Hidden Long Ago, A Craftsman's Touch, A Memory Restored · 137,060 EXP between them
Ranked by what each map’s own spawn table can produce - spawn points times EXP over the respawn timer, counting only monsters inside the band. It is a ceiling nobody reaches and the right way to compare one map with another. The full levelling guide has every band, every column and the working.
Every weapon the class can hold, with everything that is not an upgrade removed: a rung is a weapon that beats anything you could already be carrying at its level, so “gain” is what it adds over the rung above it. Sidegrades and later weaker weapons are left out and the item browser still has them. The ladder starts from level 1 on purpose - the rungs below your level are the ones you arrived holding.
Wand10 upgrades
| Lv | Weapon | Magic att | Gain | Speed | Needs | |
|---|---|---|---|---|---|---|
| 10 |  Wooden Wand Wooden Wand | 27+18 att | +27 | Normal | INT 20 | 3,000 |
| 15 |  Hardwood Wand Hardwood Wand | 34+23 att | +7 | Normal | INT 30 | 5,000 |
| 20 |  Metal Wand Metal Wand | 41+21 att | +7 | Normal | INT 40 · LUK 10 | 10,500 |
| 25 |  Ice Wand Ice Wand | 48+24 att | +7 | Normal | INT 50 · LUK 15 | 13,500 |
| 30 |  Mithril Wand Mithril Wand | 55+27 att | +7 | Normal | INT 60 · LUK 20 | 22,000 |
| 35 |  Wizard Wand Wizard Wand | 62+43 att | +7 | Normal | INT 70 · LUK 25 | 30,000 |
| 40 |  Fairy Wand Fairy Wand | 69+48 att | +7 | Normal | INT 80 · LUK 30 | - |
| 50 |  Cromi Cromi | 83+58 att | +14 | Normal | INT 100 · LUK 40 | - |
| 60 |  Evil Tale Evil Tale | 97+68 att | +14 | Normal | INT 120 · LUK 55 | - |
| 70 |  Angel Wings Angel Wings | 111+78 att | +14 | Normal | INT 140 · LUK 65 | - |
Staff7 upgrades
| Lv | Weapon | Magic att | Gain | Speed | Needs | |
|---|---|---|---|---|---|---|
| 10 |  Wooden Staff Wooden Staff | 24+20 att | +24 | Slow | INT 20 | 3,000 |
| 15 |  Emerald Staff Emerald Staff | 31+25 att | +7 | Slow | INT 30 · LUK 10 | 5,000 |
| 20 |  Old Wooden Staff Old Wooden Staff | 38+30 att | +7 | Slow | INT 40 · LUK 15 | 10,500 |
| 25 |  Wizard Staff Wizard Staff | 45+35 att | +7 | Slow | INT 50 · LUK 20 | 13,500 |
| 45 |  Arc Staff Arc Staff | 73+55 att | +28 | Slow | INT 90 · LUK 40 | - |
| 55 |  Thorns Thorns | 87+65 att | +14 | Slow | INT 110 · LUK 50 | - |
| 65 |  Evil Wings Evil Wings | 101+75 att | +14 | Slow | INT 130 · LUK 60 | - |
The highest INT in each slot a Magician can wear, then attack, then defence.
Nothing is left out for being low level, because armour does not stop being wearable: the best piece in several of these slots wants half the level of the worst, and the level on each row is when you can put it on.
Where the game ships one piece as a male and a female version, both are named and the numbers are the same either way.
Where the best piece a male character can wear and the best a female character can wear are two different items, each is listed with its own level and stat.
Bottom
two different items, one for each character
CapeINT +4
Lv 65 ·
EarringMDEF +19
Lv 15 ·
GlovesINT +7
Lv 70 ·
HatINT +7
Lv 70 ·
INT +14
Lv 70 ·
DEF +44
Lv 10 ·
ShoesINT +2
Lv 60 ·
Top
two different items, one for each character